

Module: Workflows#
Articles, posts, news, podcasts, summaries, briefings, interviews… With workflows, you can create any kind of content. Define an AI workflow for each use case and let it run automatically.
With the schedule, you can start workflows at specific times—for example, create your personalized newsletter and have it emailed to you.

Workflows: a powerful tool#
A workflow can consist of prompt chains. In that case, several prompts are run one after another to handle more complex tasks. You can also insert filters in between—text processors that prepare input texts or intermediate steps for the AI.
Examples of workflows
Articles from any sources: write articles, craft headlines, create tags, write social media posts, compare the article with the sources, and search for stock images.
Blog: research a given topic, write the blog post, and draft a LinkedIn post.
Briefing: collect information on a topic online, create a briefing, and email it to recipients.
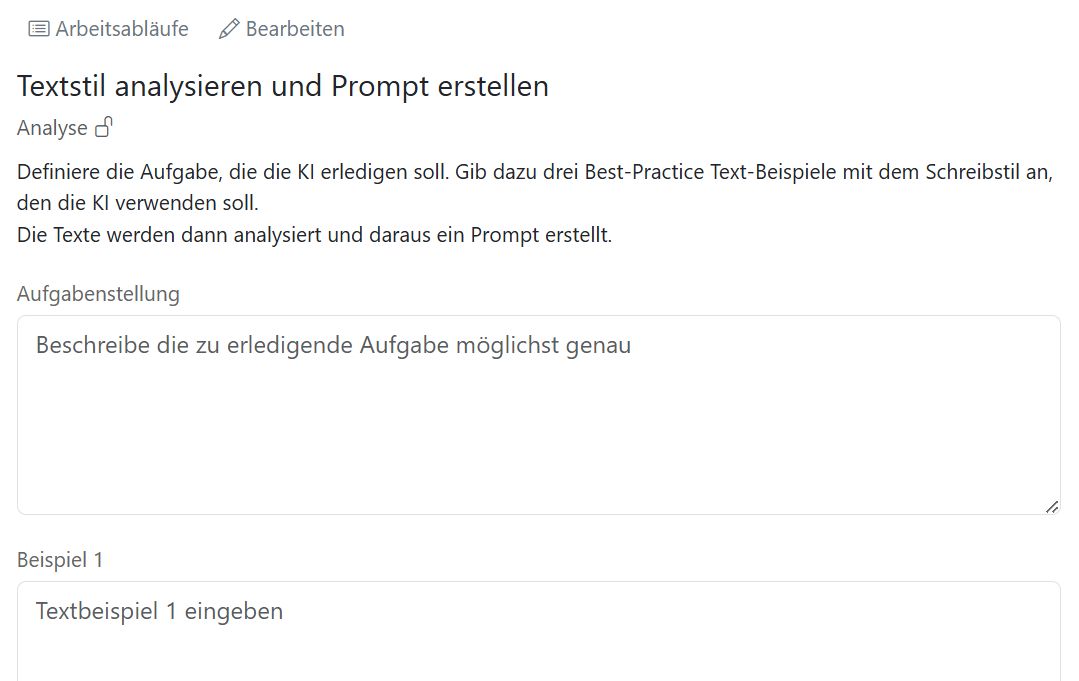
Prompt for a specific writing style: the AI analyzes sample texts and creates an optimized prompt to generate texts in that style.
Interview preparation: research a topic, create an interview guide, and suggest questions.
Workflows with AI voices#
Want to have radio news or the weather forecast voiced by AI voices? Create podcasts or voice online articles? Or write sponsor slogans and generate audio samples? Ready-made AI workflows are already available for these tasks, and you can adapt them to your needs.
Using a workflow#
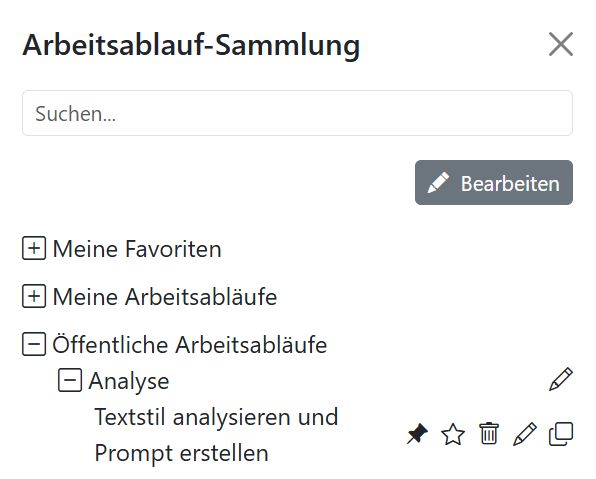
Go to the Workflows module and click Workflows. The workflow library opens. Similar to the prompt library, you’ll find the individual workflows grouped into categories here.

Click a workflow and the input fields for that task will appear. A short description tells you what to do. Enter the required information and click Submit. This starts the entire workflow.
After a short while, the results will appear. You can copy, send, or save each individual result.
Tip
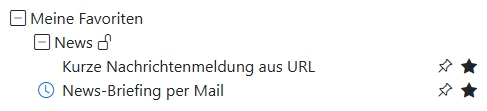
In the workflow library, you can pin a workflow using the pin icon. That workflow will then always be shown when you open the module. This is practical if you use the same workflow regularly.

Copying and editing a workflow#
If you want to change something in a workflow—for example the prompt—the easiest way is to copy the workflow first. To do this, open the workflow library and click Edit at the top. This shows additional icons for each workflow. Click the copy icon for the workflow you want.
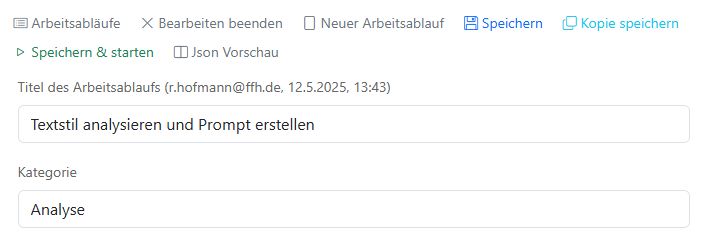
The view switches to edit mode. First, enter a new title for the workflow. Then you can go through all fields and adjust the settings.
For many steps, you can expand additional properties.

Finally, scroll back to the top and click Save. Your modified workflow will then appear in the workflow library.
Creating a new workflow#
You can also build a workflow completely from scratch. To do this, switch to edit mode. You can toggle back and forth using Edit and Exit edit mode at the top of the screen.
Click New workflow and fill in all fields from top to bottom. Start with the title, category, and description, then move on to the settings and the individual workflow steps. Don’t forget to save at the end.
Marketplace#
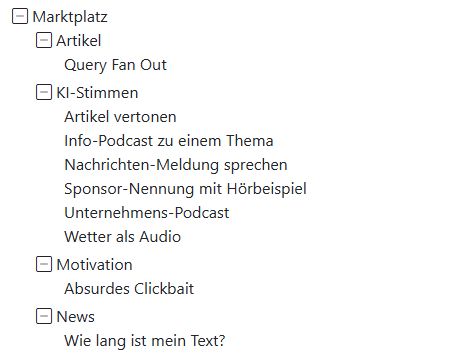
In the marketplace, you’ll find new workflows that you can use as templates or inspiration for your projects.
You can’t edit workflows from the marketplace. You can use them directly or copy them and then edit the copy.
History#
History shows all results from workflows you used in the past 14 days. Click History to open the workflow history.
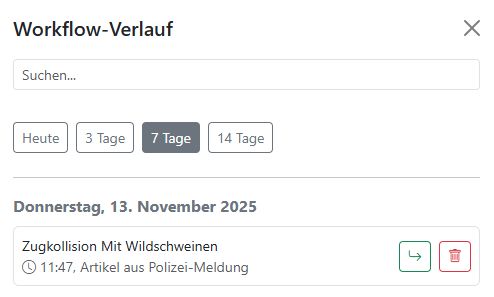
You can open the results of individual AI workflows or delete them from the history.
Use the search function to look for specific terms.
The Today, 3 days, 7 days, and 14 days buttons help you filter the history.
Results older than 14 days are deleted automatically.
The workflow editor#
In this section, we explain all editor functions in detail.
At the top of the screen, you’ll find the menu bar:

Workflows: Opens the workflow library.
Exit edit mode: Switches to the last workflow you used.
New workflow: Clears the editor contents.
Save: Saves the workflow.
Save copy: Saves a copy of the current workflow. Give the workflow a new name first.
Save & start: Saves the workflow and switches to the run view.
JSON preview: Shows the workflow in JSON format exactly as it is stored in the AI-Tools database.
Title, category, description#
Give your workflows meaningful titles and clear categories. As the number of workflows grows, this makes it easier to keep track of them. A short, concise description helps everyone who wants to use your workflow.
Settings#
In this section, you configure the basic settings. Which toggles you see depends on your permissions.
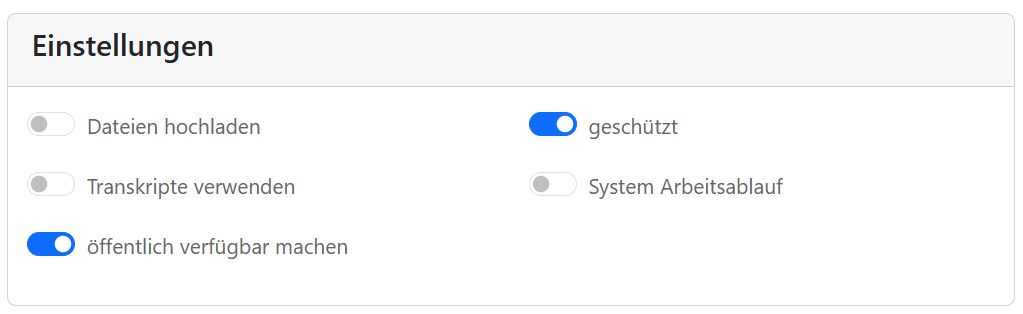
Upload files: Allow users to upload files that the AI should use.
Use transcripts: Enable transcription and voice recording.
Make public: Make the workflow available to everyone. Otherwise, only you can use it.
Protected: Only users with the appropriate permissions can edit a protected workflow.
System workflow: Special workflows that can only be triggered via the AI-Tools API are system workflows. Only users with the appropriate permissions can view and manage them.
Your system administrator manages permissions. This helps protect important workflows from being deleted or overwritten by accident.
However, you can always create a copy of a workflow—even a protected one.
Input fields#
Define which input fields your workflow needs. Users see these fields and can enter the information the AI should work with.
Use the blue + Field button to create a new input field. You can use the following field types:
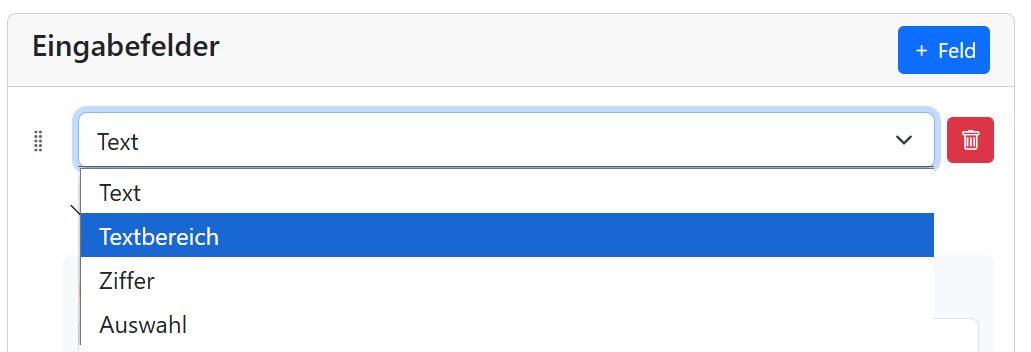
Text: A simple single-line text input.
Textarea: A text field for longer text.
Number: Only numbers can be entered here.
Select: Let the user choose from different options.
Checkbox: Let the user select one or more options.
Properties#
Expand the properties for each input field:
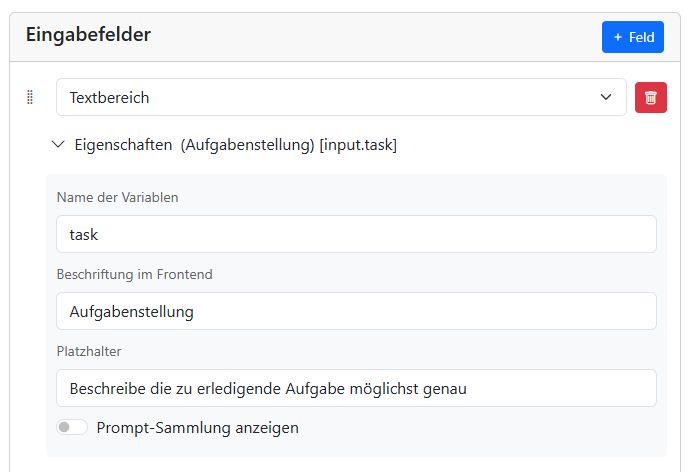
Name: Give the input field an internal name. You’ll need it later to tell the AI which field to use.
Label: The field label shown to the user.
Placeholder: A short hint telling the user what to enter.
Show prompt library: Displays the icons above the text field for opening the prompt library, saving a prompt, and using the magic wand.
Select fields#
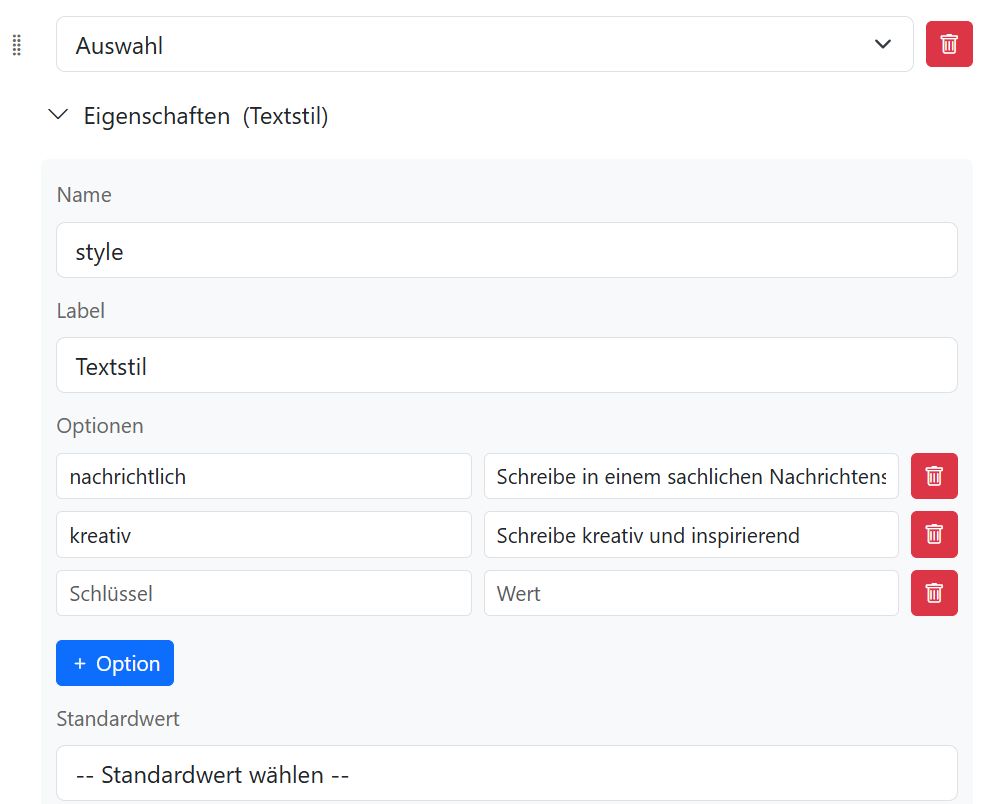
With the Select field type, you can add multiple options. Click the blue + Option button. For each option, enter a displayed key and a value the AI will use. In the Choose default value drop-down, you can specify which option is selected initially.
Checkboxes#
Checkboxes let the user select one or more options.
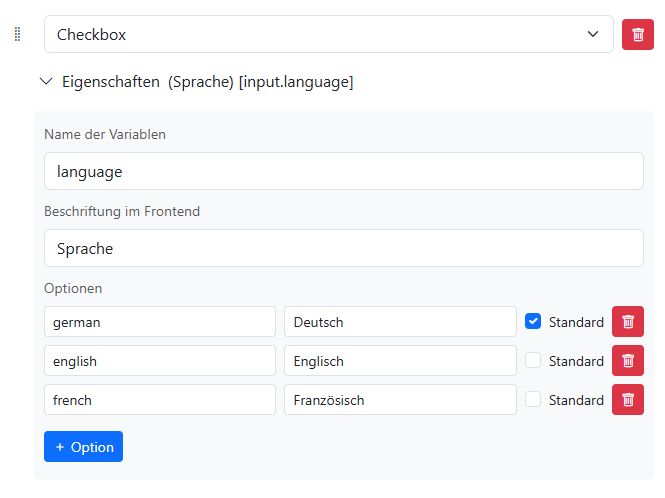
You can add multiple options. Click the blue + Option button. For each option, enter a displayed key and a value the AI will use. Check Default if an option should already be selected.
This is what our language selection looks like for the user:

In the input memory for the checkbox group, all values selected by the user are listed. For example, if German and French are selected, then [input.language] contains ‘german’, ‘french’.
If the user selects nothing, [input.language] is empty.
Reordering#
To the left of each input field, you’ll see a dotted rectangle. Use it to change the order of the input fields via drag and drop.
Memory#
Before we look at the individual steps, let’s first take a look at the memory feature. Workflows have internal memory areas where you can store and retrieve information:
input, data, output, api, and user.
In a step’s properties, you can use a drop-down field to select the memory area and then enter the name of the memory variable.
A particularly powerful feature is that you can also use these memory variables in text fields, such as prompts.
You access the value of a memory variable using the following notation:
[<memory_area>.<memory_variable>]
This way, a prompt can access the user’s input. Let’s say you created two input fields named “name” and “job”.
[data.datetime] contains the current date and time. This value is set automatically.
Today is [data.datetime]
Encourage and praise [input.name]
so that it becomes a good and successful day.
Don't hold back on praise, motivation, and compliments.
Also refer to the job [input.name] does: [input.job]
Important: The memory area name is always written in lowercase. The name of the memory variable is used exactly as you write it, but without spaces.
Input#
This memory area contains all values from the input fields. If you create an input field named agentur, the text entered by the user is stored under [input.agentur].
Data#
Here you can store intermediate results that should not be shown later.
Some memory variables are predefined. Please do not use these names for your own variables:
[data.date] The current date: Tuesday, 02/04/2025
[data.time] The current time: 22:20
[data.datetime] Date and time: Tuesday, 02/04/2025, 22:20
[data.docs] Uploaded files (except images).
[data.images] Uploaded images.
[data.transcript] Selected transcripts and voice recordings.
[data.audios] Uploaded audio files. For each audio: file name, file type, file size, duration in milliseconds, internal task_id.
Output#
This memory area contains all results that should be displayed, sent, or returned via the API.
API#
The return values from external APIs are stored here. Assume, for example, that a weather API returns the following JSON:
{
    "date": "2025-04-28",
    "report": "Sunny days with mild temperatures are expected.",
    "warning": "No warning"
}
Those three return values are then stored in [api.date], [api.report], and [api.warning].
User#
This is where information about the currently logged-in user is stored.
[user.username] The user’s login name, usually the email address.
[user.displayname] The user’s display name. This is the name shown in the AI-Tools interface.
[user.mail] The user’s email address.
IMPORTANT: The user memory is only populated when a workflow is started manually by a logged-in user. If a workflow runs automatically via a schedule, the user memory is empty.
Tip
What you can do with it:
You can send an email to the user who started the workflow.
To do this, enter the placeholder
[user.mail]in the To field of the Distribute → Send email step.
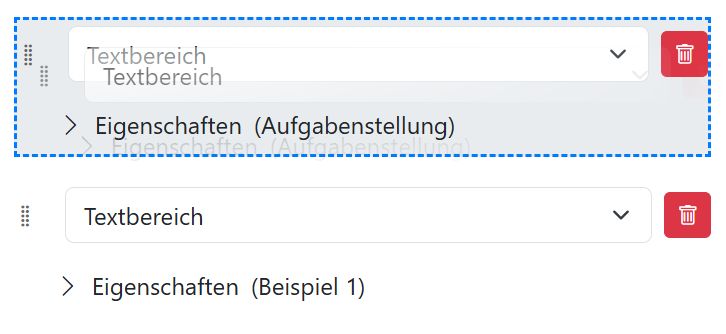
Placeholder hints#
To help you find the right placeholders more quickly, there’s a small hint: in the properties of input fields or steps, you’ll always see which placeholder is generated.

The input field has the label Example 1 and generates the placeholder [input.example1].
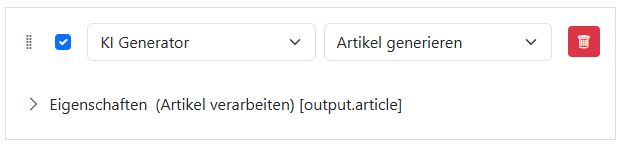
The AI generator creates the placeholder [output.article].
Steps#
Now we get to the actual workflow. Use the blue + Step button to add a new step. All steps are processed one after another—for example in prompt chains, where each prompt builds on the output of the previous one.
Sometimes language models can also work in parallel—for example because they process different input fields, or because they simultaneously continue processing the outputs of a previous step.
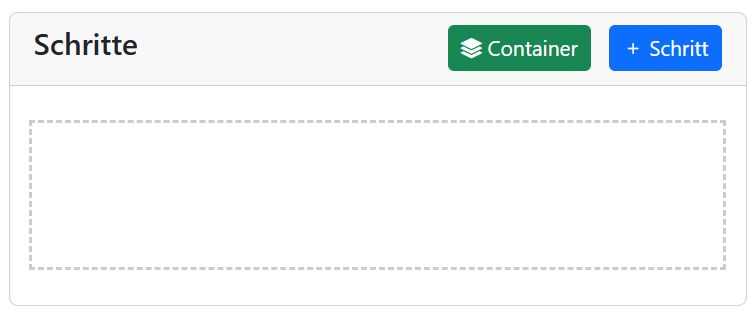
For these cases, use the green Container button to create a parallel container. All steps inside it are processed at the same time. This makes your workflow much faster.
You can reorder all steps via drag and drop. The blue checkmark indicates whether a step should be executed. This is very useful for testing.

Let’s now go through the types of steps you can use. In the first drop-down, choose the step type: Filter, AI generator, or Distribute.
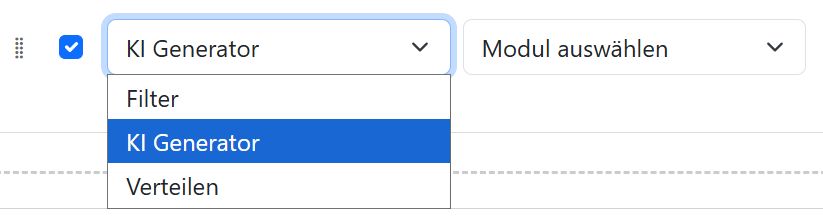
Filters are, for example, text processors that remove information from a text that is not intended for the AI. You can also use filters to affect text formatting.
AI generators are workflow steps in which a language model processes or generates text.
Distribute includes functions for automatically sending results—for example by email.
Filters#
You can currently choose from the following filters:
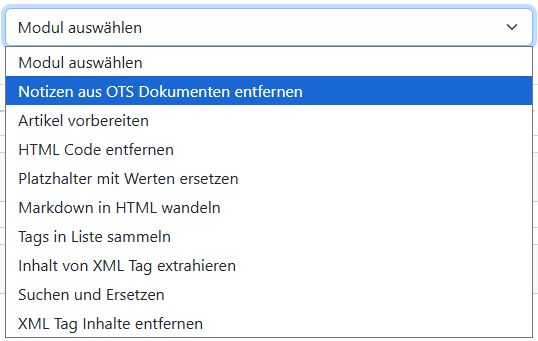
Remove notes from OTS documents#
Removes notes from OTS documents—for example the research contact details of police departments. This filter directly processes the uploaded files stored in [data.docs]. There are no additional properties. This preprocessor is typically used at the beginning of a workflow.
Prepare article#
This text preprocessor is specialized for dpa news agency reports. It removes the research information starting from the Notizblock section of the text. The result is stored in [output.text]. If possible, the following additional information is extracted from the text and saved in the output memory:
[output.service_id], [output.agency_tags], [output.original_headline], [output.location].
Remove HTML code#
Removes HTML tags from the text.
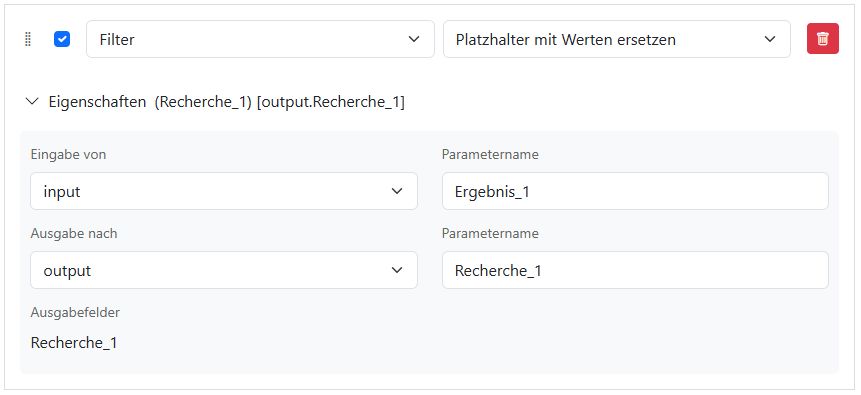
Replace placeholders with values#
The content of one memory placeholder is copied to another memory variable. For example, you can copy the placeholder [input.Ergebnis_1] to [output.Recherche_1].
Merge: text and placeholders#
Here, you can merge multiple text values and placeholder values—for example, results from different AI generators. The merged result is stored in a new memory variable.
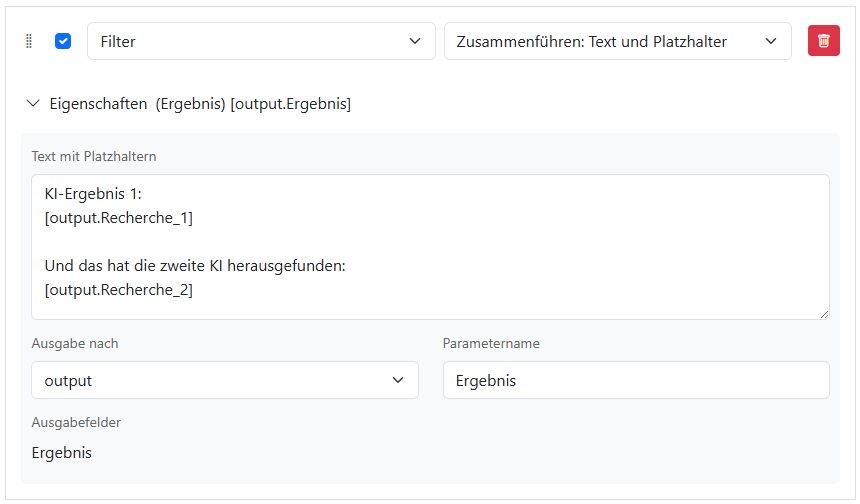
The output of this example could then look like this:
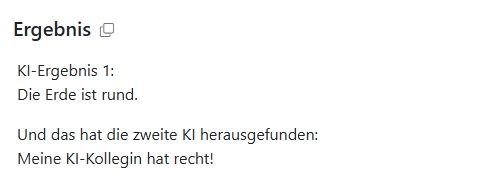
Convert Markdown to HTML#
Language models usually output formatted text (bold, headings, italics, etc.) in Markdown format. This text processor converts Markdown to HTML, for example so the text can be displayed in a browser.
Extract content from an XML tag#
In your prompts, you can ask the AI to wrap individual parts of the output text in so-called XML tags. This filter works similarly to the Collect tags into a list filter. However, it does not output a comma-separated list.
For example, if the AI generated multiple texts marked with <text>, those texts are shown as separate fields in the output.
Find and replace#
With this filter, you can replace individual parts of the text with other text. Under Find, enter the text you want to replace. Under Replace, enter the text you want to replace it with.
Maximum replacements specifies how often the filter should replace the text. The replacements are then distributed evenly across the document. “0” means that all occurrences are replaced.
Finally, with Do not replace inside tags, you can prevent the filter from replacing text that is enclosed in XML tags.
This filter is useful, for example, for replacing specific keywords with a link.
Remove XML tag contents#
Unlike the other filters, this one deletes everything enclosed by an XML tag—including the XML tag itself. With reasoning models, for example, you can use it to remove the thinking part. The AI usually marks this part with the <think> tag.
AI generators#
For all AI generators, you can choose the language model to be used for the task, such as “GPT-4 Omni” or “Claude 4 Sonnet”.
You can set the temperature the AI should use. Values between 0 and 2 are allowed. The higher the temperature, the more creative the model becomes. Be careful with high values above 1.5—models can start to hallucinate quickly.
You can define the prompt and the system prompt for the AI. Above the prompt text fields, you’ll find the buttons for opening the prompt library, using the magic wand to improve the prompt automatically, and the save icon for adding the prompt to the prompt library.
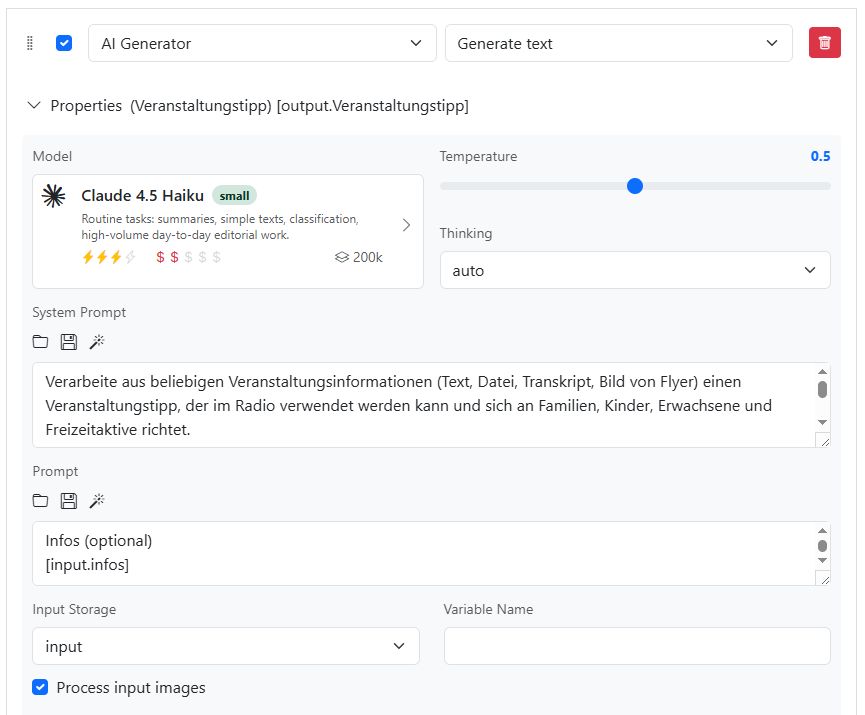
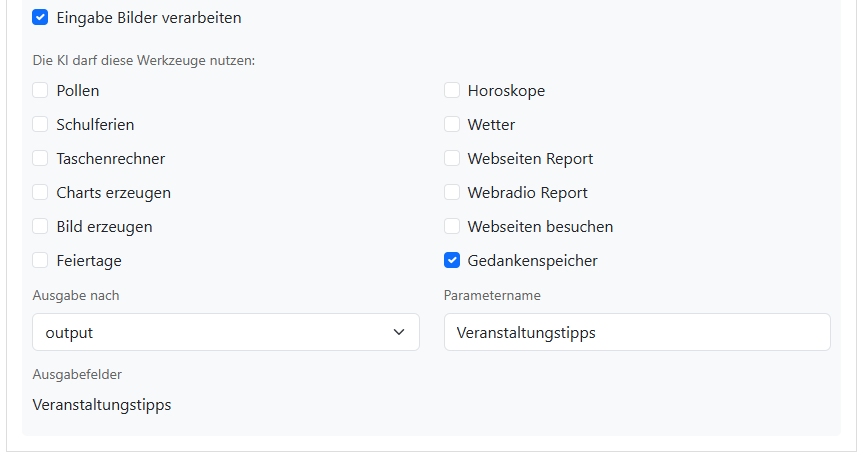
Also specify which tools the AI is allowed to use: visiting web pages, memory, calculator, and so on.
Check Process input images if you uploaded images that the AI should process.
Function for extracting output data#
For most AI generators, you can specify a function (a filter) that extracts parts of the language model output that are marked with an XML tag. These texts are stored in the output memory. This is useful, for example, if the AI should generate several headline suggestions.
Process article: Extracts the text from the article generator and stores it in [output.article].
Headlines: For the metadata generator. Extracts all headlines marked with <h1>, <h2>, or <h3> and stores them in [output.h1].
Two-line headlines: For the metadata generator. Extracts headlines marked with <roofline> and <headline> and stores them in [output.double_headline].
X post: For the metadata generator. Extracts texts marked with <tweet> and stores them in [output.tweet].
Facebook post: For the metadata generator. Stores the AI output in [output.facebook].
Instagram post: For the metadata generator. Stores the AI output in [output.insta].
WhatsApp message: For the metadata generator. Stores the AI output in [output.whatsapp].
Hashtags: For the metadata generator. Stores the AI output in [output.hashtags].
Tags: For the metadata generator. Stores the AI output in [output.tags].
Now let’s look at the special features of the individual AI generators.
Generate article#
We use this AI generator to write online articles. It always stores the result in [output.article].
In addition to the general properties, there are extra settings:
Use documents: Uploaded documents should be processed. The texts are marked for the AI with the <doc> tag.
Prompt for documents: This text is added to the end of the prompt. Typically, it says: “Also use the information from the documents marked with <doc>.”
Use transcripts: The AI also takes transcripts into account.
Prompt for transcripts: The text in this field is added to the end of the prompt. Typically: “Also use the information from the transcript marked with <transcript>.”
Maximum number of words: Enter the upper limit for the text length in words here. Use the placeholder [n_words] in the system prompt. The value for [n_words] is determined as follows: all words in the input text, the documents, and the transcripts are counted together. That number is then used for [n_words], unless it exceeds the upper limit. In that case, the limit is used instead. This prevents the AI from creating a longer text from short source texts and making up facts in the process.
Function for extracting output data: Choose Process article here.
Generate text#
Uses a prompt and system prompt to generate any AI text. This is the most flexible AI generator.
Generate metadata#
With this generator, you can create follow-up texts based on a text (for example an article), such as headlines or posts.
Specify only the system prompt. As the prompt, we use the text you define under Input from, for example [output.article]. Typically, after an article has been generated, we run several metadata generators at the same time in a parallel container.
In the Function for extracting output data drop-down, choose the appropriate filter for extracting the result. At the same time, the filter also defines the output memory variable. This simplification lets you configure metadata generators more quickly.
Source comparison#
This generator compares an article created by the AI with all the information that served as input. The generator also takes uploaded documents and transcripts into account. This lets you quickly determine whether information was shortened or phrased ambiguously when the article was created.
This function does not replace a manual fact check!
The result is stored in [output.sources_check].
Optimize prompt#
The magic wand is also available as a dedicated AI generator. The system prompt is fixed. Just enter the prompt that should be optimized.
Stock images#
You can only use this generator if stock images are configured in your AI-Tools setup.
With Source and Alternative source, you specify outputs from previous AI steps, such as the article generator, that should be used to find suitable images in your stock image library.
Distribute#
Most of the time, you’ll review the AI results directly in the browser. But you can also distribute the results. At the moment, this is possible by email. As soon as the AI result is available, it is sent to all specified email recipients.
Don’t misuse this! In other words, don’t spam anyone unintentionally.
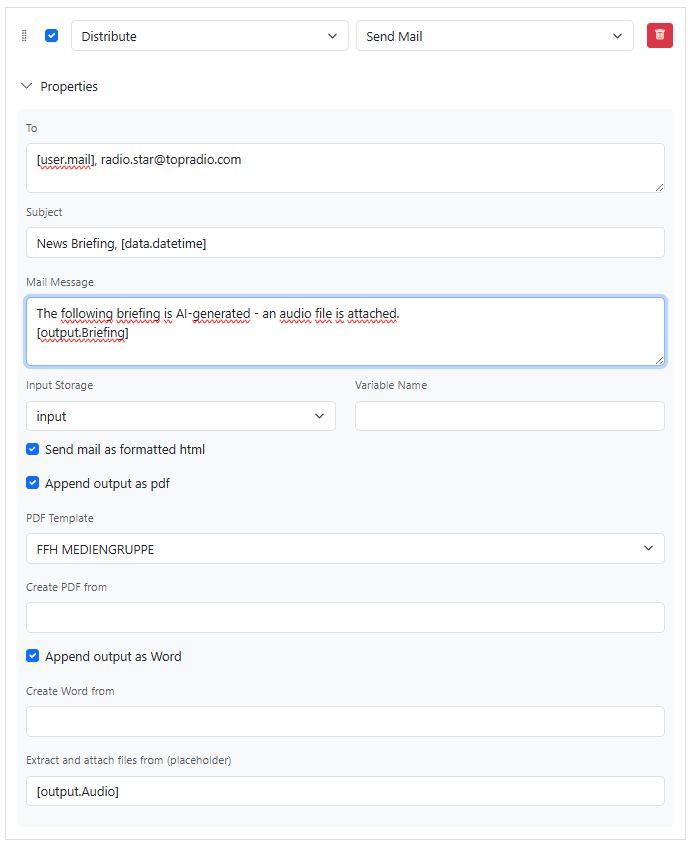
To: Comma-separated list of email addresses. You can also use the placeholder
[user.mail]to send the email to the user who started the workflow.Subject: The subject line of the email.
Message: You can enter a text with placeholders as the message. Before sending, the placeholders are replaced with the contents of the specified memory variables.
Input from: Instead of a message, you can simply specify a memory variable. Its content will then be sent as the message.
Send as formatted HTML message: The language model’s Markdown format is converted to HTML before sending. In most email clients, this lets you see formatted text. If you don’t want that, uncheck the box.
Attach output as PDF: A PDF document is created from all active output fields and attached to the email. Charts are embedded as images. This makes it possible to create very polished reports.
PDF template: Choose a template to use for the PDF export.
Create PDF from (placeholders): Here you can specify which content should be included in the PDF document. Simply list all placeholders whose content you want to include in the PDF.
Attach output as Word: A Word document is created from all active output fields and attached to the email. This allows the email recipient to conveniently edit the result in Word format.
Create Word from (placeholders): Here you can specify which content should be included in the Word document. Simply list all placeholders whose content you want to include in the Word document.
Extract and attach files (placeholders): All files stored in a storage location are extracted and attached to the email. This is useful if, for example, you have generated documents or audio files. Enter all placeholders here as a comma-separated list where the files are stored. For example, [output.Audio].
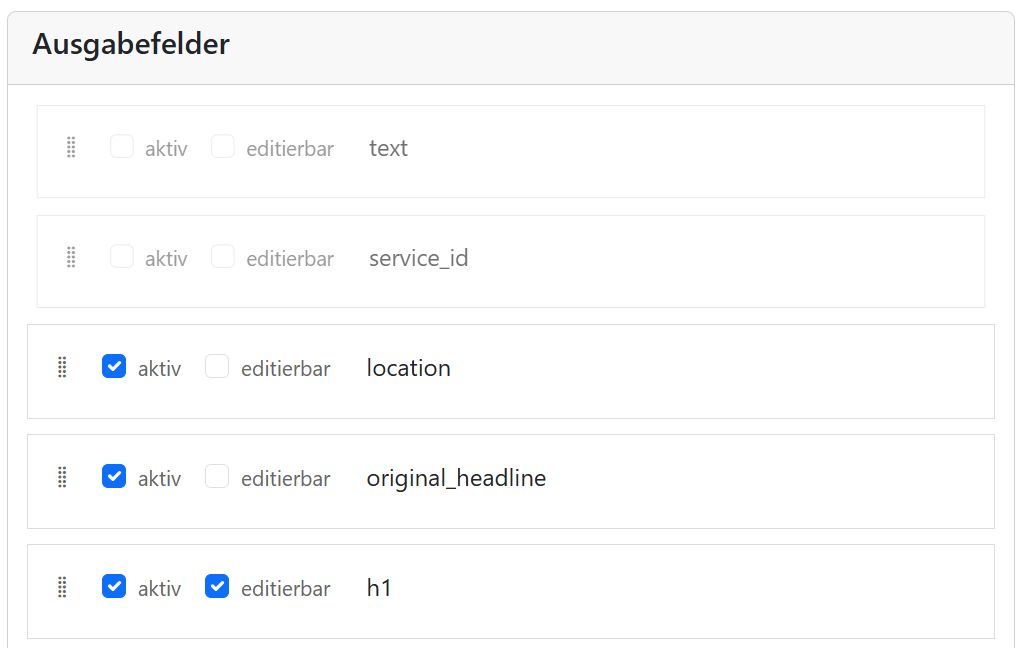
Output fields#
In this section, you’ll find all output fields created in the individual steps. For each output, you can specify whether it should be shown to the user at all. You can also choose whether the field should be editable. This is practical if you want to send the results to a CMS afterwards, because it lets you edit the texts in AI-Tools first.
All output fields can be reordered via drag and drop.
CMS settings#
In this section, you can configure settings if a CMS is set up. The selection buttons then determine where in the CMS the AI texts should end up.
Schedule#
The schedule is only shown if the steps include a Distribute function, such as Send email.
Use the plus icon to add one or more schedules. Choose the recurrence pattern for distribution: weekly, monthly, or quarterly. Finally, set the day or weekdays and the time.
Your workflow is executed and the result is distributed at each of the specified times.
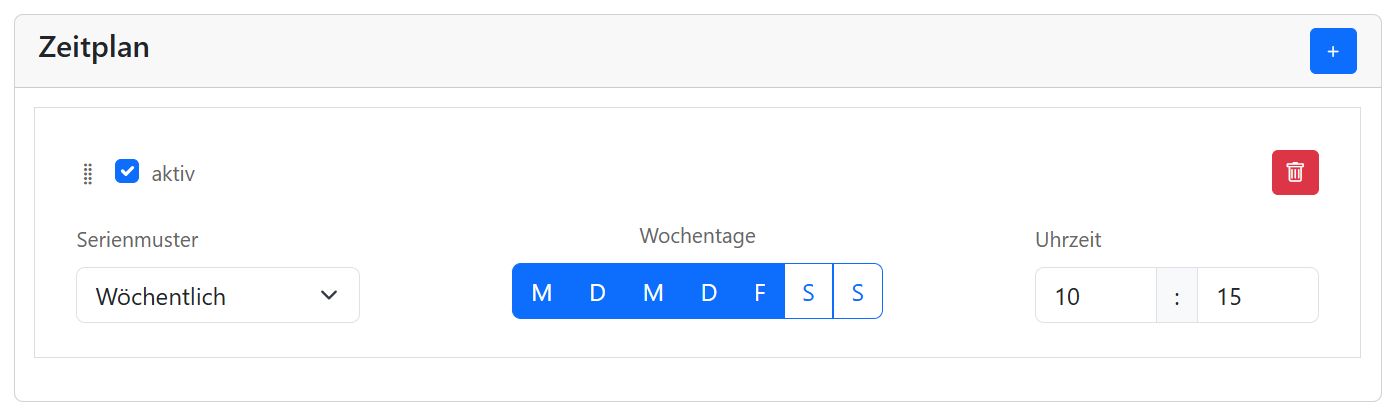
All workflows with an active schedule are marked in the workflow library.
Workflow API#
All workflows that you created in the AI-Tools interface can also be called via the API. This is useful if you want to integrate the workflows into your own systems - for example into a CMS, an editorial system, or your own script.
Each workflow automatically becomes its own API endpoint as soon as it has been saved.
Note
You can request your organization_key and your api_key from the AI-Tools team.
Interactive API Documentation#
You can find the full interactive API documentation (Swagger UI) at the following URL. There, you can test endpoints directly in your browser:
https://ai-api.radio-creator.com/<organization_key>/workflow/docs#
Finding the Workflow ID#
Each workflow has a unique workflow_id. Here’s how to find it:
Open the desired workflow using the Edit button.
Click JSON Preview.
The
workflow_idis shown at the very top of the JSON view.
Calling the Endpoint#
A workflow is executed using an HTTP POST request. The URL is composed of your organization_key, the workflow_id, and the api_key:
curl -X 'POST' \
  'https://ai-api.radio-creator.com/<organization_key>/workflow/run?workflow_id=123&api_key=<api_key>' \
  -H 'accept: application/json' \
  -H 'Content-Type: multipart/form-data' \
  -F 'params={"topic":"Current traffic reports for Frankfurt"}' \
  -F 'files=@verkehrsbericht_montag.pdf;type=application/pdf' \
  -F 'files=@studio_foto.jpg;type=image/jpeg'
Replace <organization_key> and <api_key> with your own credentials.
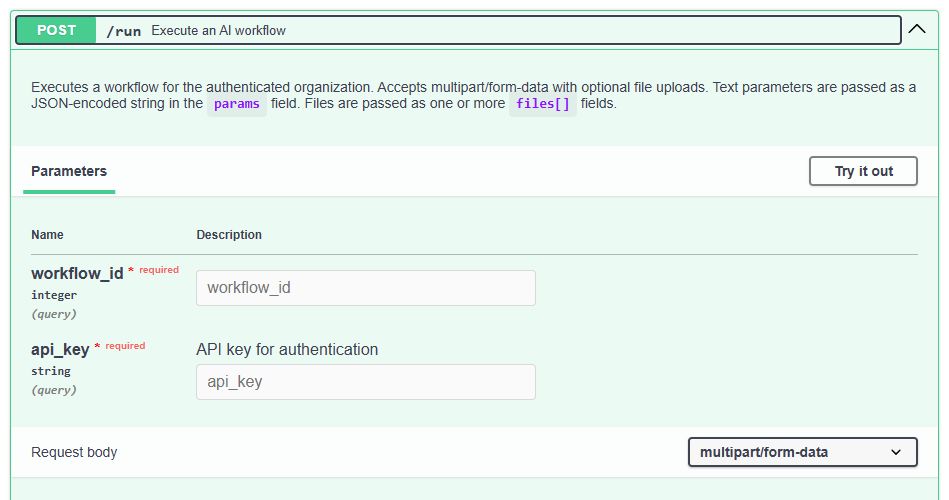
Parameters#
The endpoint accepts multipart/form-data with the following fields:
Field |
Required |
Description |
|---|---|---|
|
✅ Yes |
The ID of the workflow to be executed (query parameter). |
|
✅ Yes |
Your API key for authentication (query parameter). |
|
❌ No |
JSON string containing all input fields of your workflow as key/value pairs. The fields correspond exactly to the input fields you defined in the workflow editor. |
|
❌ No |
One or more files (images, PDFs, audio files, etc.). Specify the field multiple times to upload multiple files. The files are made available to the AI just like uploads via the browser. |
Tip
You can find the field names for params in your workflow editor - they are exactly the identifiers you assigned to your input fields.
Return Values#
The endpoint returns all values that you stored in the output memory of your workflow.
Example: If you write the AI result to output.result, the API response will contain a "result" field with the generated text.
In addition, each response includes the fields tokens (tokens used) and time_used (execution time).
Example response:
{
  "result": "Presenter text for 4 PM: After a sunny morning, a few clouds will move in during the afternoon. Temperatures will remain a pleasantly mild 21 degrees - a lovely day to spend your lunch break outside.",
  "tokens": 318,
  "time_used": "2.8 s"
}